Steps to Add a New Item
- Under the Admin tab select -> Item Admin
- Click Add Item
- Choose the item type. Most commonly, this will be Product, as it is the standard for regular items.
- Complete all required fields under the “Basic Info” tab:
- Category: Select an existing category or create a new one.
- Item Name: Enter a clear and descriptive name for your item.
- Leave all other fields blank, especially Effective Date, unless you have specific information to enter in those fields.

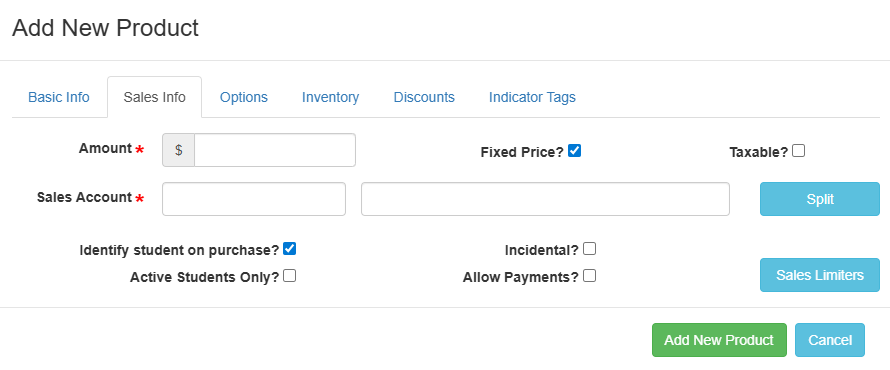
- Go to “Sales Info” and complete the required fields:
- Amount: Enter the price of the item.
- Sales Account: Select the account where the funds should be deposited. To split funds between multiple accounts, click Split.
- Identify Student on Purchase:
- If checked, the system will require a student name for the purchase.
- If unchecked, the item can be sold to anyone without linking it to a student. Note: If unchecked, the item will not be linked to a student, and you will not see a name in the Item Sales list.
- Active Students Only?: Enable this option if the item should only be available for current students.
- Allow Payments: Turn this on to allow students to make installment payments for this item.
Optional:
- Go to “Options” and complete the required fields:
- To load another item's options, click Load
- Rearrange options to set the desired order
- To add a new option click Add New Option
- Add a price change or quantity change, if needed. Example: To increase the price by $2.00, enter 2 in the Price Change field.
- If multiple options, click Add All Values to add all options at once

Optional:
- Go to “Inventory” and complete the required fields:
- Click Track Inventory: Select this option if there is a limit on how many units of the item can be sold.
- Cost Account: Choose the account that will be used to purchase additional inventory.
- Count Section: Enter the current inventory amount for each item option.
- Reserved and Total Cost: Leave these fields blank.

Optional:
- Go to “Discounts” and complete the required fields:
- Click Add New Discount
- From the drop-down menu, select who will receive the discount: ASB Card Holder, Student, or Teacher.
- Enter the account that will absorb the discounted amount
- Specify the discount: Enter a percentage off, or Enter the discounted price.
- Click “Add.”

Click Change Product to save your item!