An item payment happens when a student still has a balance for an item, meaning they owe money specifically for that item, and the item has been set up to allow payments. *Note: To allow students to make payments toward an item, Allow Payments must be turned on in Item Admin.
Head over to the Receipts tab and select Point of Sale.
- Choose your Station, then click Start.
- In the From section, enter the individual’s name or ID number (the For section will fill in automatically for you).
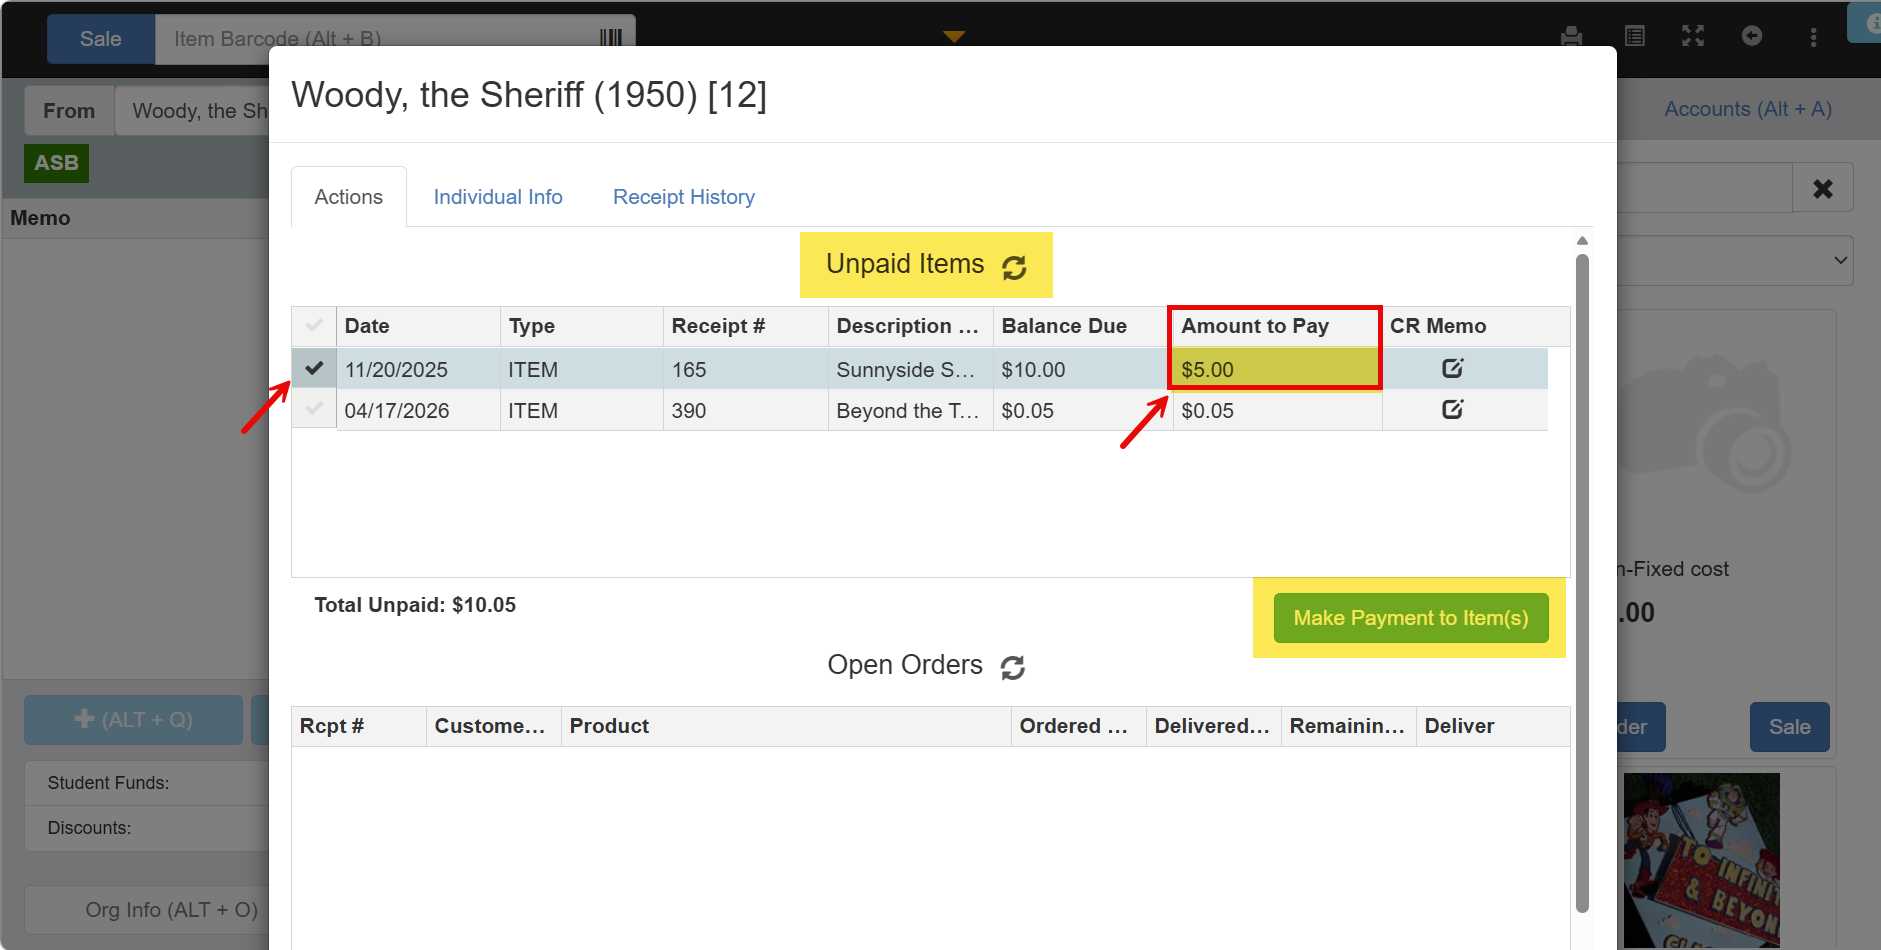
- The Student Info window will pop up, where you can view and select any Unpaid Items for that person.
- Select the Unpaid Item they’d like to make a payment toward and enter the amount they’re paying in the Amount to Pay box.
- Once the amount has been entered in Amount to Pay, highlight the line item
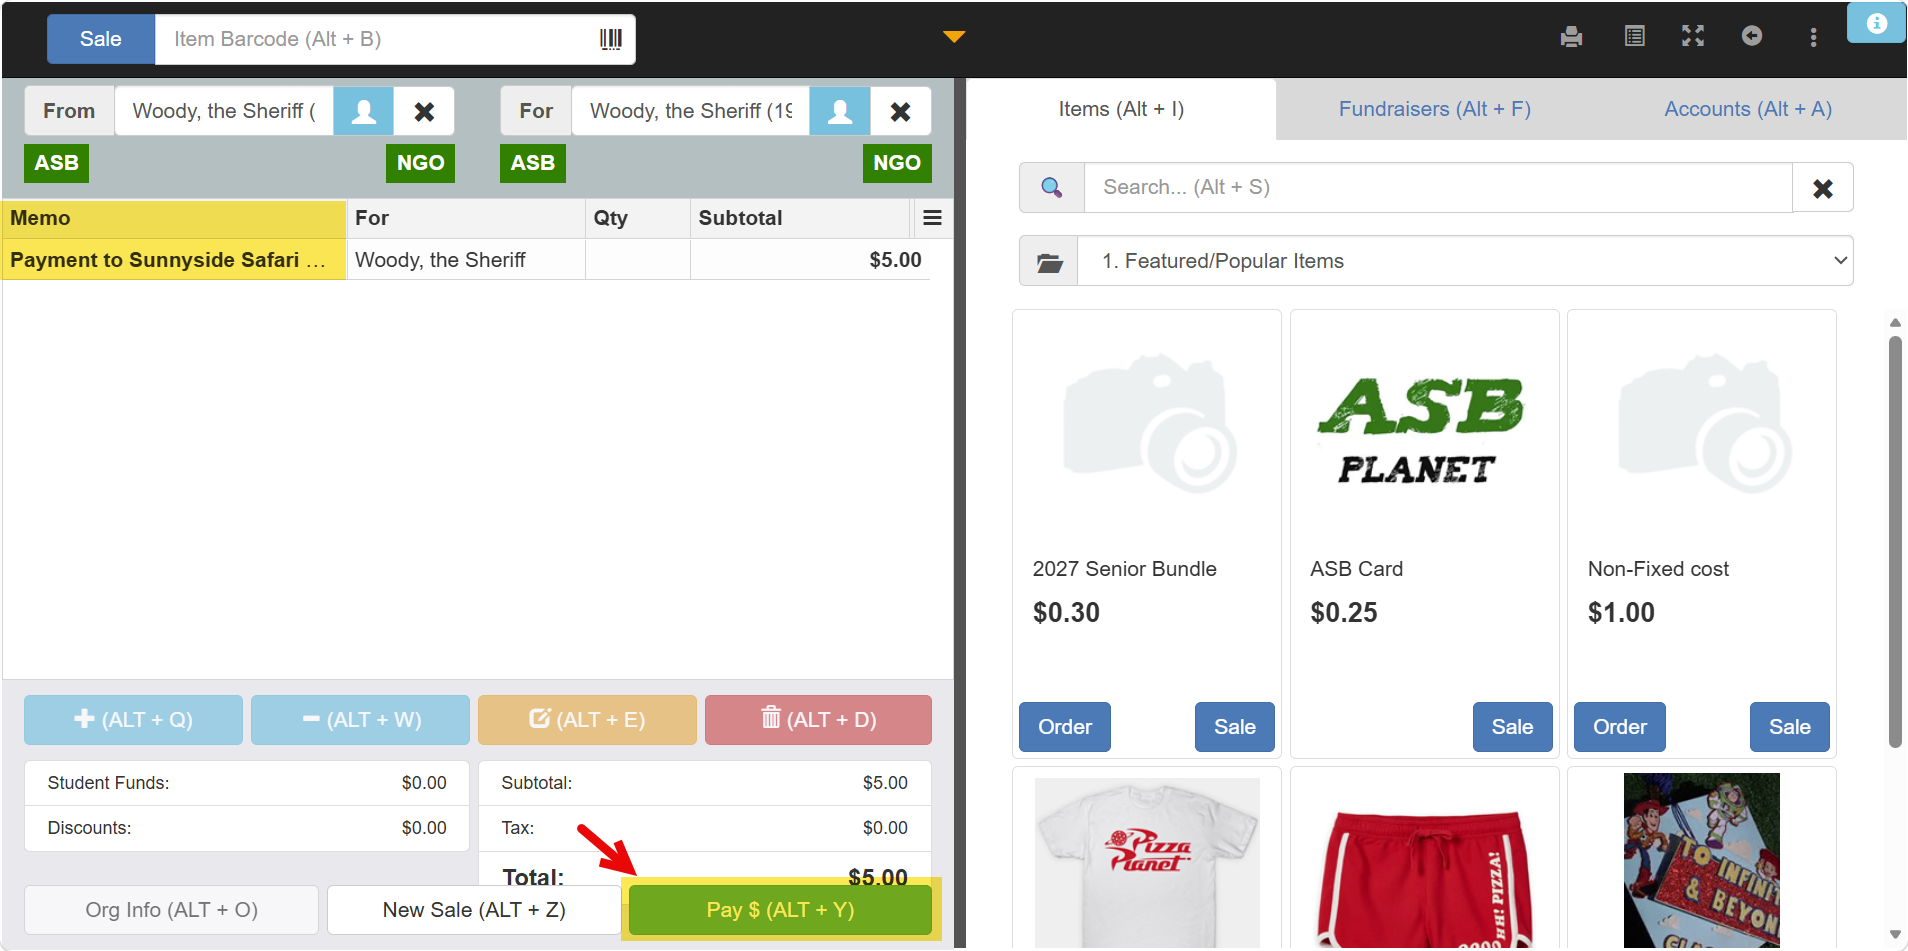
- Click Make Payment to Item(s) to bring that item onto the receipt screen.
- Click Pay $ to bring up the payment screen
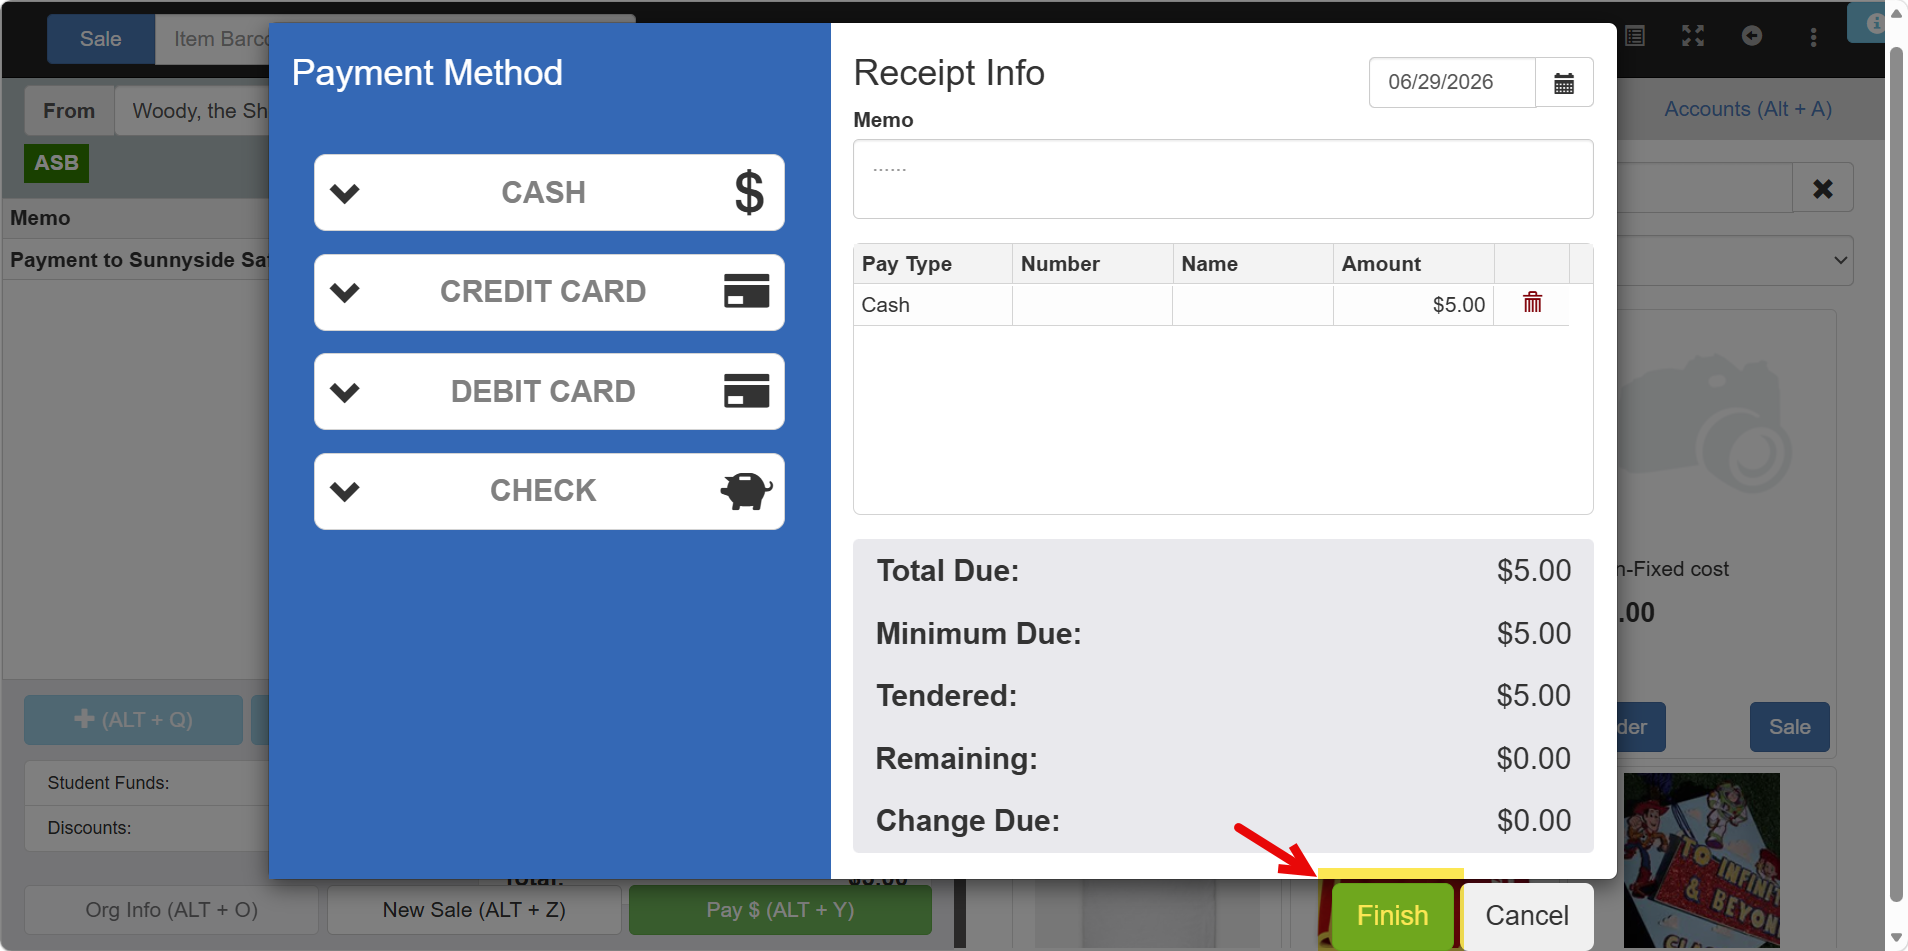
- Choose the Payment Method, enter the dollar amount you are receiving
- Click Add
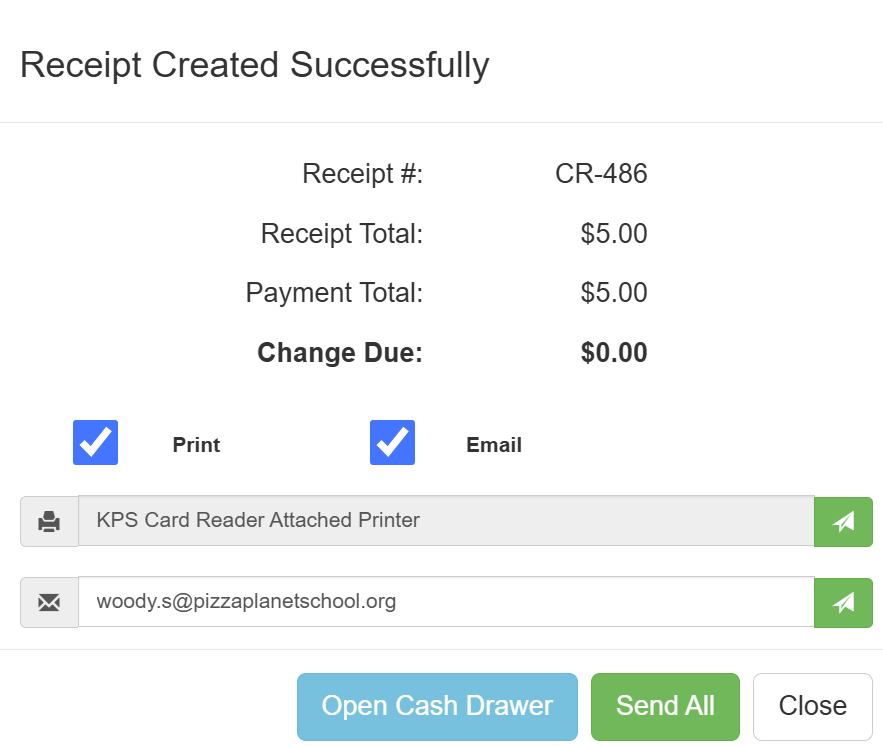
- Click Finish to create the transaction receipt